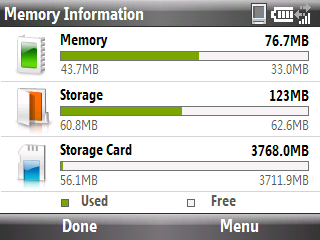
Continuing where we left off from the previous article (see Do You Want To Improve Your Battery Life? for further details), this lesson will give you additional lessons on how to improve the battery life for your Samsung Code.
IV. Adjusting The Back Light Timing
1. Press the Left Soft Key to select Start -> Settings -> Power Management.
2. Scroll to the Backlight time out click thru menu and change the settings from Never (or whatever you have it set to) to 5 or 10 seconds.
3. Press the Left Soft Key to select Done.
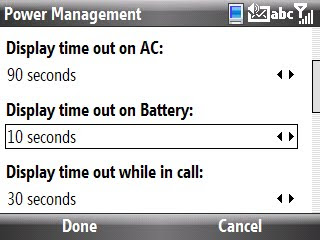
V. Adjusting The Display Time Out
1. Press the Left Soft Key to select Start -> Settings -> Power Management.
2. Scroll to the Display time out on Battery click thru menu and change settings to 10-15 seconds.
__________________________________________________
Do you want to see more tips like this one? Check out the m.Tip Library to find all the m.Tips in one convenient place.
Friday, January 29, 2010
m.Tip: Do You Want To Improve Your Battery Life?
I decided to take a deeper dive in this article then I originally did [see m.Tip: The Six Things You Can Do Right Now To Improve Your Battery Life (Without Buying Or Installing A Thing) for further details] and provide specific instructions on how to extend the battery life of your Samsung Code.
I. Shut off Bluetooth when you aren't using it.
1. Press and hold the Lock Key to access the Quick List menu.
2. Scroll to the Wireless Manager and hit the Left Soft Key to choose Select.
3. If Bluetooth is ON, it will look like this:
4. To shut off Bluetooth, scroll to Bluetooth and press the OK Key.
II. Shut down your Bluetooth Receptivity when not in use.
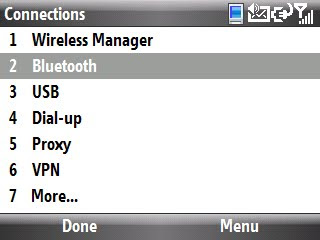
1. Hit the Left Soft Key to select to Start -> Settings -> Connections.
2. Click the 2 Key to select Bluetooth.
3. Click the 3 Key to select Incoming Beam Setting.
4. Remove the check icon from the Receive incoming beams check box by pressing the OK Key.
5. Hit the Left Soft Key to select Save which will bring you back to the Bluetooth Setting Master Menu.
6. Press the 7 Key to select More.
7. Press the 1 Key to select Discoverable Mode Setting.
8. Change the default settings from Always to either a 1 min, 3 min or 5 min interval by clicking the Navigation Button/Jog Wheel to the right (3 o'clock position).
9. Press the Left Soft Key to select Save.
III. Change Email Synchronization Settings.
1. Press the Left Soft Key to select Start -> Messaging.
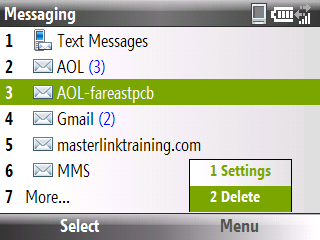
2. With the email account you want to change highlighted, press the Right Soft Key to select Menu and then press the 1 Key (or the OK Key) to select Settings.
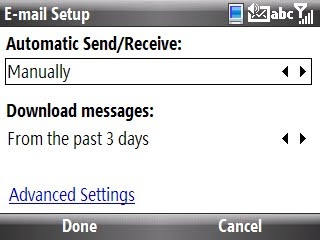
3. Highlight Send/Receive Schedule and press the OK Key to select.
4. Change the Automatic Send/Receive settings to either Manually or 2 Hours or more.
5. Press the Left Soft Key to select Done.
__________________________________________________
Do you want to see more tips like this one? Check out the m.Tip Library to find all the m.Tips in one convenient place.
Thursday, January 28, 2010
Learn-In-A-Minute Video: Connect Your Samsung Code To Any Exchange Server You Want
Here is a brief tutorial providing you with the instructions you'll need if you want your Smartphone to get direct push email from any Microsoft Exchange Server (to get work related emails):
For anyone that is interested in written instructions on how to use the Ultimate Command Center, feel free to visit:
http://thecodeofmetropcs.blogspot.com/2010/01/mtip-did-you-know-you-can-get-emails.html
________________________________________________
Do You Have Another Minute To Learn Another Trick? If so, check out the Learn-In-A-Minute Video Library…
m.QandA: Where Your Questions Truly Matter
I'd like to take a moment to acknowledge anyone and everyone that has ever asked me a question in the past.
Your questions have often forced me to reach for new knowledge, challenge my own position and at times, to stretch my capabilities and imagination (ok, that might be pushing it a bit).
But you have all helped me to grow in the process and for that, I'm grateful.
It's for you that I dedicate and erect this new category in The (samsung) Code of Metro PCS called m.QandA---mQandA is short for mobile Questions & Answers.
This is now a dedicated section of this site where you or anyone else can ask all of your questions.
Let's begin with your first question, shall we?
Wednesday, January 27, 2010
m.Tip: How To Delete An Email Account From Your Samsung Code
Somebody recently posted the following question, "how do I delete my email account from my phone?" which is the subject of this m.Tip.
How To Delete An Email Account From Your Smart Phone
1. Hit your Left Soft Key to select Start -> Messaging.
2. Highlight the email account you wish to delete and hit the Right Soft Key to select Menu -> Delete.
3. Hit the OK Key or the 2 Key to select Delete.
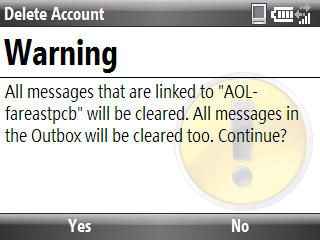
4. Hit the Left Soft Key to select Yes to confirm that you want to delete this email account and its contents.
Vanquished!!!
__________________________________________
Do you want to see more tips like this one? Check out the m.Tip Library to find all the m.Tips in one convenient place.
m.Tip: Want To Get Your Memory Back?
The latest in the Memory Saver Series (See What You Should Always Do When Downloading & Installing Applications On Your Samsung Code, How To Install Applications To Your SD Card Instead Of Your Smartphone's Memory, Want To Free Up Memory By Putting Your Ringtones On Your SD Card? and Have Your Samsung Code Store All Of Your Pics And Vids On Your SD Card Automatically to get other ideas about how you to recover your smartphone's on-board memory back), here's a tip that could help you regain a meaningful chunk of memory back (particularly if you haven't done it yet).
The "closet" that I suggest needs some cleaning is your favorite browser's cache folder and page view history. With this said, here are instructions on how to clear your history and cache on three of the more popular mobile web browsers (IE, Opera and Skyfire).
Internet Explorer House Cleaning
1. Open IE (Go to Start -> Internet -> Internet Explorer)
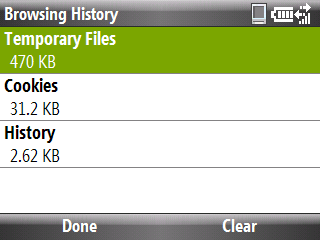
2. Hit your Right Soft Key to select Menu, then go to Tools -> Options until the following screen appears:
3. With Temporary Files highlighted, hit the Right Soft Key to Select Clear.
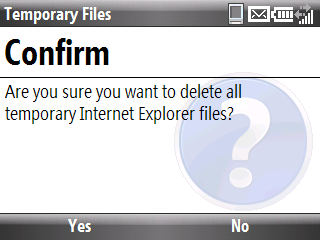
4. Hit the Left Soft Key to select Yes to confirm that you want delete all the temporary Internet Explorer files.
5. Repeat steps 3 & 4 to delete the Cookies and History folders.
Opera House Cleaning
1. Open your Opera browser.
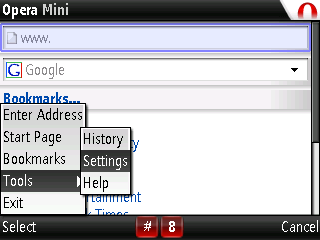
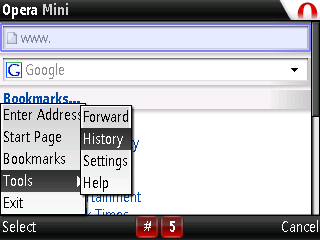
2. Hit your Left Soft Key to select Menu -> Tools -> History.
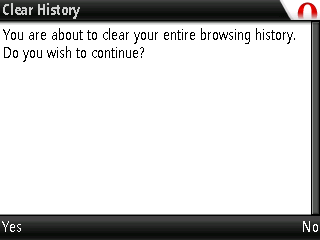
3. Hit your Left Soft Key to select Clear.
4. Hit your Left Soft Key to select Yes.
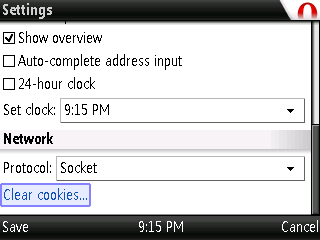
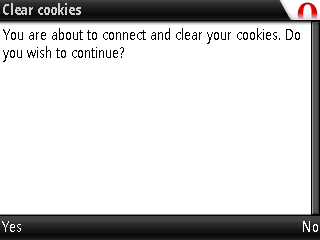
5. To clear cookies, hit your Left Soft Key to select Menu -> Tools -> Settings.
6. Scroll to the bottom of the page and highlight Clear Cookies and then hit your OK Key to select.
7. Hit your Left Soft Key to select Yes to delete your cookies.
Skyfire House Cleaning
1. Open your Skyfire browser.
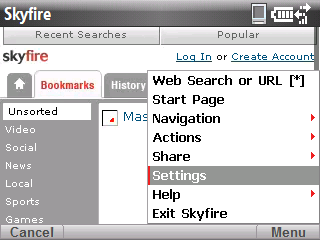
2. Hit you Right Soft Key to select Menu -> Settings.
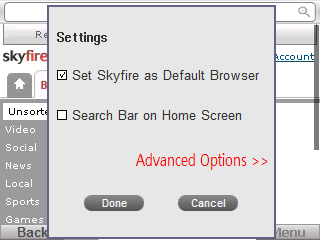
3. Use your Navigation Button/Jog Wheel to scroll and select Advanced Options (you'll know when it is selected because it will change from blue to red).
4. Use your Navigation Button/Jog Wheel to hover the pointer over the Clear Cookies button and hit the OK Key to delete cookies (a pop up window will appear telling you that you were successful).
5. Hover the pointer over the Clear History button and hit the OK Key to delete history.
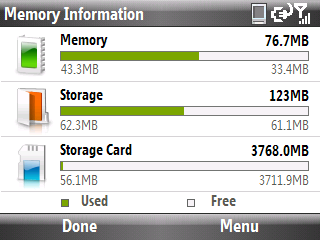
How much memory did you recover?
Here's my before (bear in mind that I clear this every week, so my results will prove to be less dramatic then someone doing it for the first time):
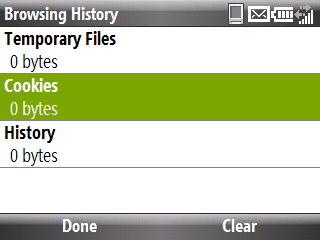
Here's my after:
I recovered 1.5MB in storage space/smartphone memory, how much did you recover? Let me know by leaving a comment below.
__________________________________________
Do you want to see more tips like this one? Check out the m.Tip Library to find all the m.Tips in one convenient place.
Timesaver's Tip: The Many Personalities Of The Messaging Key
Did you know the Messaging Key provides two shortcuts at your disposal?
If you just Press the Messaging Key, your text message history will appear:
But if you Press and Hold the Messaging Key, you will can compose a new SMS/text message:
________________________________________________
If you liked this Timesaver, check out the rest at the Timesaver’s Almanac.
If you just Press the Messaging Key, your text message history will appear:
But if you Press and Hold the Messaging Key, you will can compose a new SMS/text message:
________________________________________________
If you liked this Timesaver, check out the rest at the Timesaver’s Almanac.
m.Tip: How To Have Security Without Needing To Remember Anything
But a password...
I recently wrote about how Samsung Code owners could take measures to evoke certain security measures to prevent loss, theft or privacy invasion (see Protect Your Mobile Ass...ets for further details), but none of this matters if you just "forget about it".
If this sounds like you, then there is something you can do that would allow you to "set it and forget it" and this feature is called the Automatic Device Lock.
This feature allows you to set your Samsung Code to automatically lock itself (at a time interval that you predetermine) and allows you to take extra measures to minimize the "hackability" of your smartphone in the event of loss or theft.
Although I did mention this feature in my previous article (See Precaution #3 for further details), I think a "deeper dive" is in order (if for nothing else, to stress to the few the importance of setting up some sort of line of defense for your smartphone).
Follow these steps to set up your first line of defense against theft and loss and "set it and forget it":
1. Find the Device Lock Feature (Go to Start -> Settings -> Security -> Device Lock).
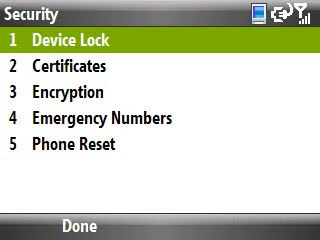
2. Check the Prompt if device is unused for check box.
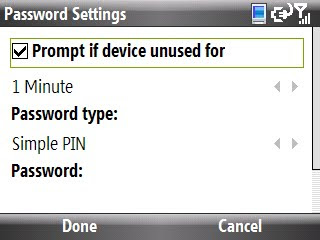
3. Select a inactivity time limit (how long your smartphone will be inactive before the Device Lock feature is activated) by using the Jog Wheel/Navigation Button (you can choose from 1 Minute to 24 Hours).
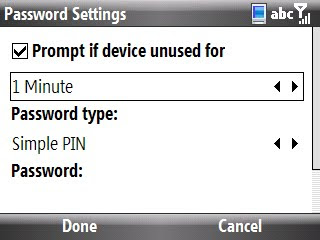
If you want to scroll your options quicker without using the Jog Wheel/Navigation Button, simply hit the OK Key to access this scroll down menu:
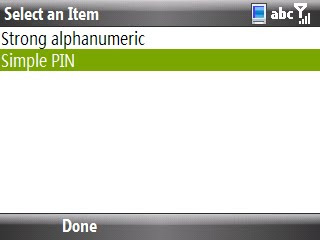
4. Select the Password Type you would like to use (you can choose from Simple Pin [numeric password] or Strong alphanumeric [a password with both numbers and letters]).
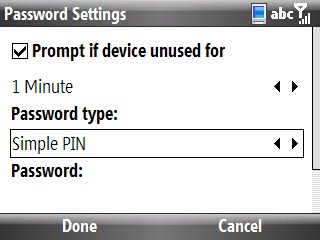
Use the OK Key for quicker access to your options:
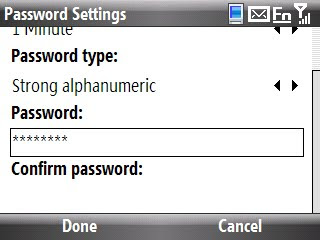
5. Enter your choosen Password (when you type your password, you will be able to see the letters/numbers for only a moment, then your password with be converted to protected status [*******]).
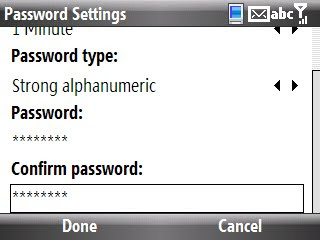
6. Confirm your Password.
7. Hit your Left Soft Key to select Done to save Device Lock setup setting.
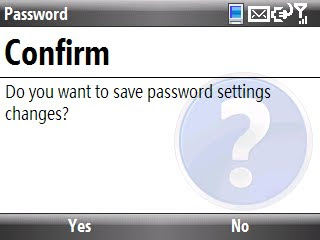
8. Hit your Left Soft Key to select Yes to save the password settings.
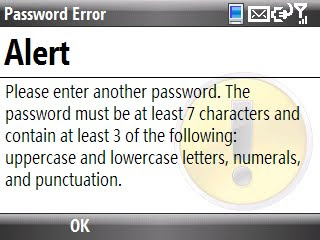
9. If you chose to use the "strong alphanumberic" password type, your password must contain a minimum of 7 characters and contain at least three of the following character types:
- Uppercase Letters
- Lowercase Letters
- Numerals
- Punctuation
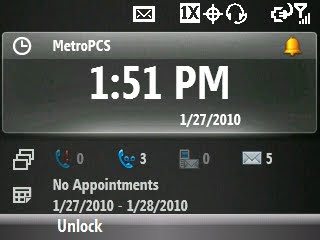
10. Once your Samsung Code reaches your preset inactivity time limit, your homescreen will look like this:
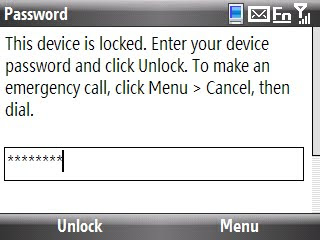
11. To gain access to your smartphone, hit your Left Soft Key to select Unlock and then you will be prompted to enter your password.
That's how you create and use security access with your Samsung Code.
What if you are in a "safe place" (home, friend's house, etc.) and don't need the added security?
Deactiviting the Automatic Device Lock is easy (but not so easy for outsiders that don't know the "magic word" [the password]) if you follow these steps:
1. Go back to the Device Lock Feature (Go to Start -> Settings -> Security -> Device Lock).
2. Once you click on Device Lock, you will be prompted to enter your password to access the screen and make any changes (this is how we keep the "undesirables" out).
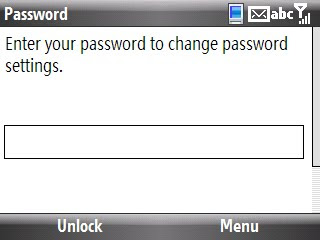
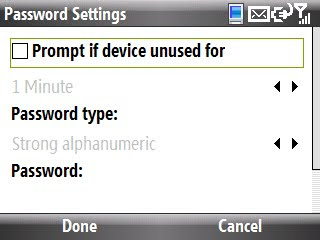
3. Remove the check from the Prompt if device is unused for check box and hit your Left Soft Key to select Done.
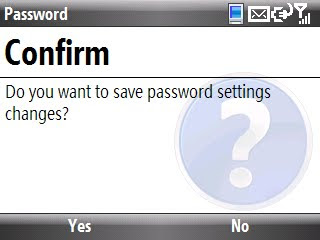
4. Confirm that you want to make these changes by hitting the Left Soft Key and selecting Yes.
Security system deactivated...
If you are saying to yourself, "This sounds great and all, but I don't want to miss anything if I do this", then don't fret. You can still receive and make (if the number is on your Emergency List) calls even if your Samsung Code is locked.
__________________________________________
Do you want to see more tips like this one? Check out the m.Tip Library to find all the m.Tips in one convenient place.
Subscribe to:
Posts (Atom)